E-Stop
Add an emergency-stop button to a DIY hub with a simple pull-up or pull-down circuit.
What you need
- A Button or mommentary switch
- a resistor (anything between 10k to 200k will work well)
- Soldering station
- Hookup wire (optional, depending on whether the pins line up)
Figuring out the pins
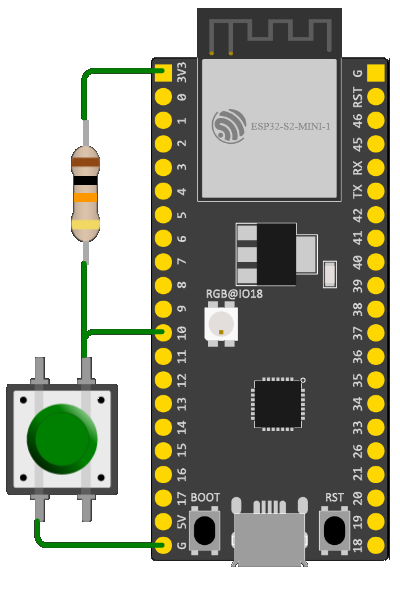
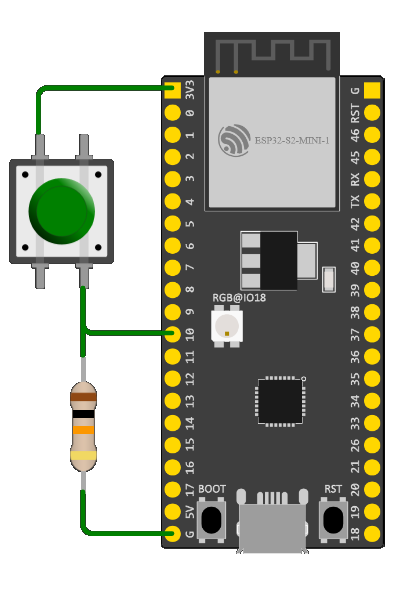
You will need to connect the button and resistor in a pullup or pulldown configuration to one of the ESP32's IO pins.
Either pullup or pulldown will work use which ever is easier for your board.
Most of the GPIO pins on any given ESP32 board should work for E-Stop, however some pins are reserved for special usage and will return an error if you attempt to use them during setup. If you run into that error, adjust your setup to use a different pin with a higher number.
Note down which GPIO pins you soldered to, as you will need to enter them during setup in a later step.
For example, if you bought a Wemos Lolin S3 , simply connect the 3.3V to one of the switch legs, Connect the resistor and a short wire to the other switch Leg, Connect the wire to Pin 10, Lastly connect the resistor to the Ground pin.
Best effort list of web serial terminals available for your convenience:
- https://serial.namelessnanashi.dev/
- https://serial.huhn.me/
- https://www.serialterminal.com/
- https://webserialterminal.com/
Don't forget to enter these during setup!
Using A serial Console estop enabled true to enable the E-Stop function, Not doing so will mean the E-Stop will not work when pressed!
You can change E-Stop pin with estop pin # where # is your pin number.
That's it.
You can press the E-Stop to Stop all Shock, Viberations, and Beeps. 🎉
Last updated on